“Breaker Blocks often align with the overall trend, signaling potential reversals or significant price shifts.”
Michael J Huddleston
This section builds upon the concepts introduced in the preceding main sections: ‘ICT Candlestick Fundamentals’ and ‘Understanding Order Blocks.’ It is advisable to review those earlier sections before proceeding.
In ‘ICT Candlestick Fundamentals’, we explored how bearish (down) candles support price increases, while bullish (up) candles act as resistance, pushing the price down. These are, in fact, also called Order Blocks. They mainly support trend continuation.
‘Understanding Order Blocks’ delved into the characteristics used to identify High Probability Order Blocks, which are typically found at pivot points—both highs and lows—resulting in changes in trend direction. These characteristics enhance the probability of success for Order Blocks.
There are a few differences between High Probability Order Blocks and Order Blocks that support trend continuation:
High Probability Order Blocks:
- Usually occur at key levels, as previously explained, during breakout failures.
- Sweep liquidity to establish initial order fills for institutional buyers.
- Cause a trend reversal at external and internal structures (highs and lows).
Order Blocks that support trend continuation:
- Occur after High Probability Order Blocks form; they are not the first Order Blocks to form.
- Do not have to sweep liquidity, although they may sweep minor liquidity levels inside the trend.
- Can occur at key levels as breakout continuations.
When Order Blocks Fail
At some point, a reversal is bound to happen as a result of the overall market structure, which will be covered in a later section. For now, the focus is on Order Blocks and how traders can use them to understand Order Flow.
When price action starts to change direction, traders should watch and see if previously formed Order Blocks will provide support to the primary trend. If price does find support and continues in the primary trend direction, then the pullback is a small retracement and not a reversal.
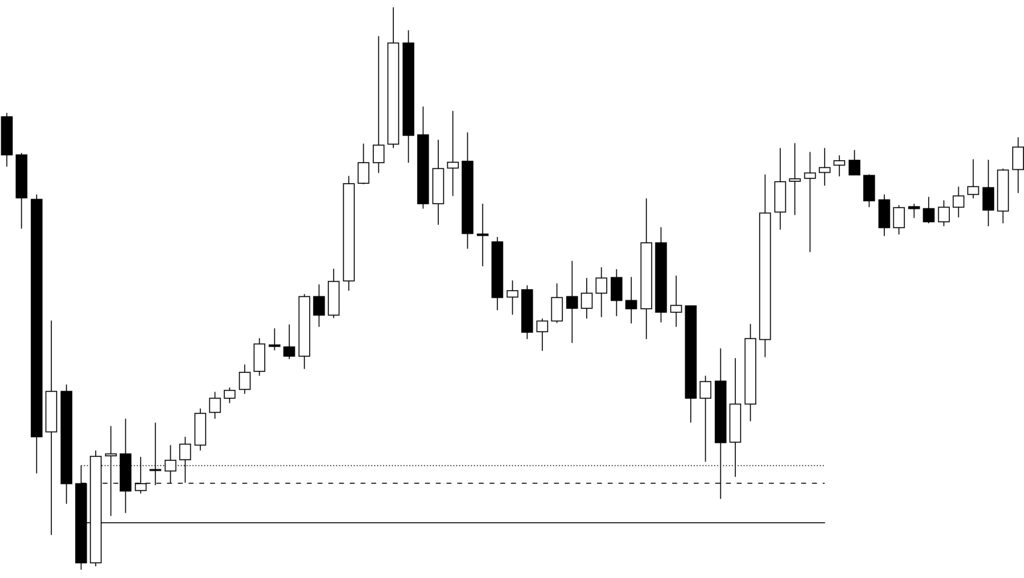
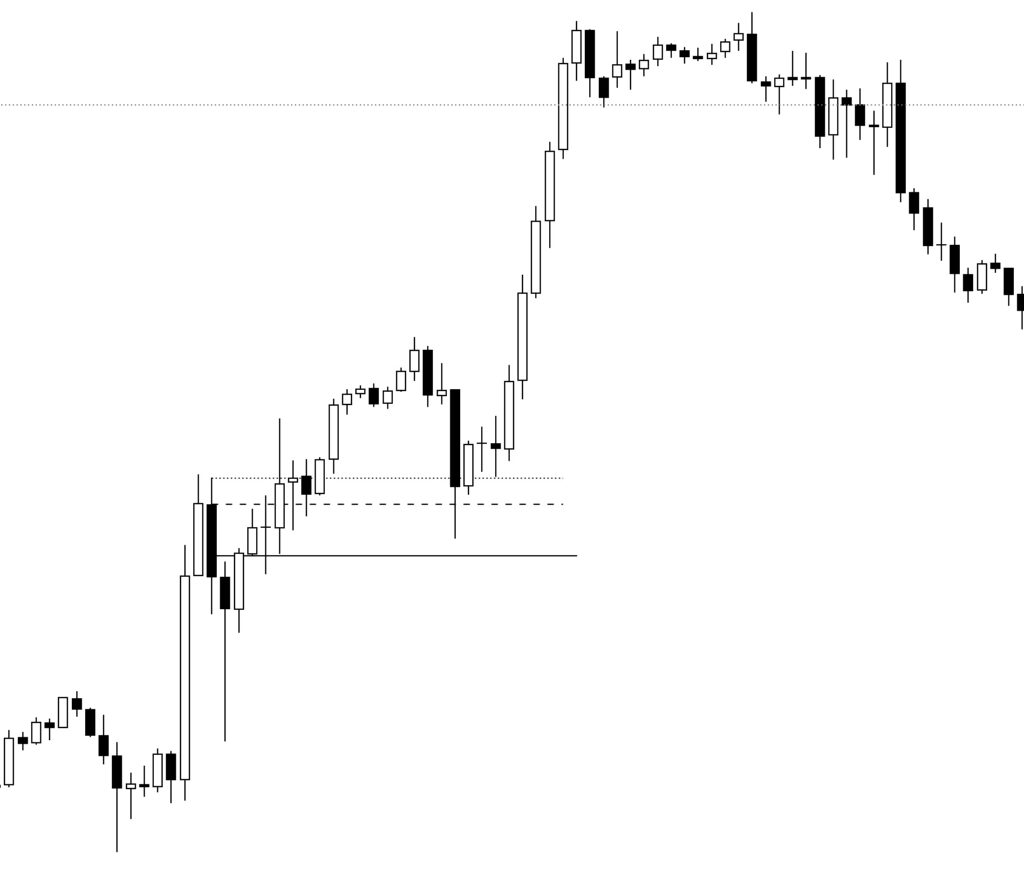
However, if the Order Block fails to support price and the low of a candle drops below a bullish Order Block or above a bearish Order Block, then that Order Block has is considered a failed Order Block and now is evaluated as either a Breaker Block or Mitigation Block depending on the type of failed Order Block.
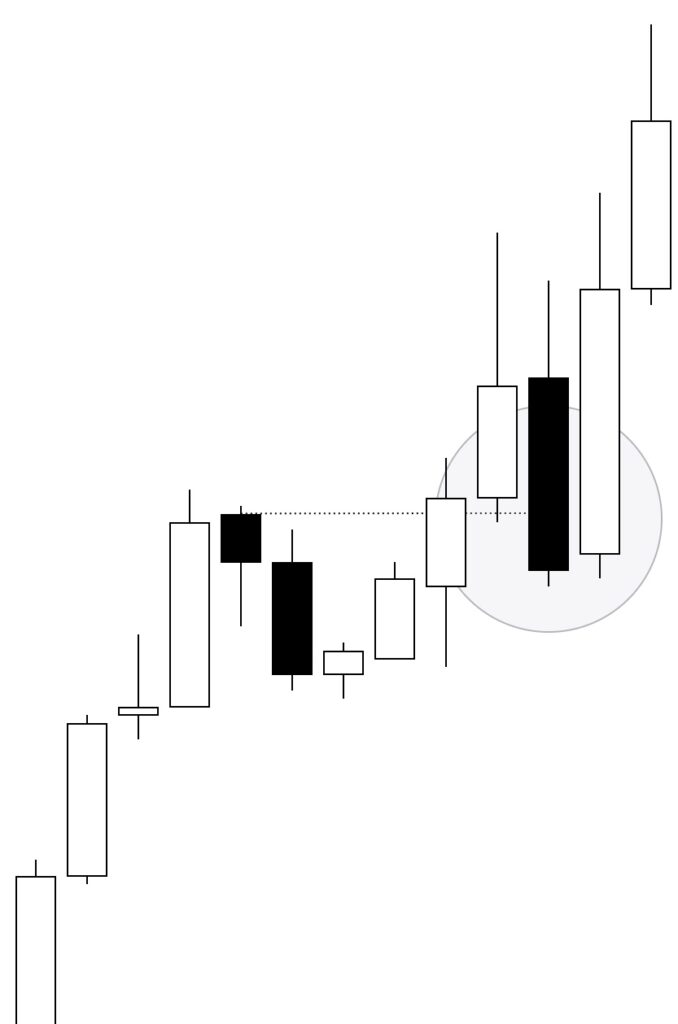
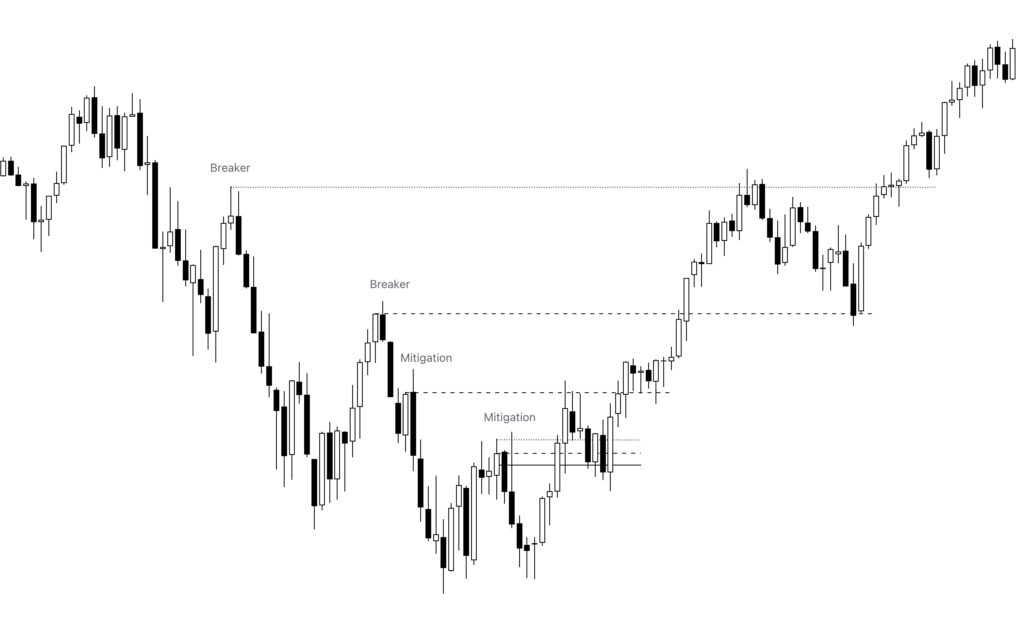
Breaker Blocks
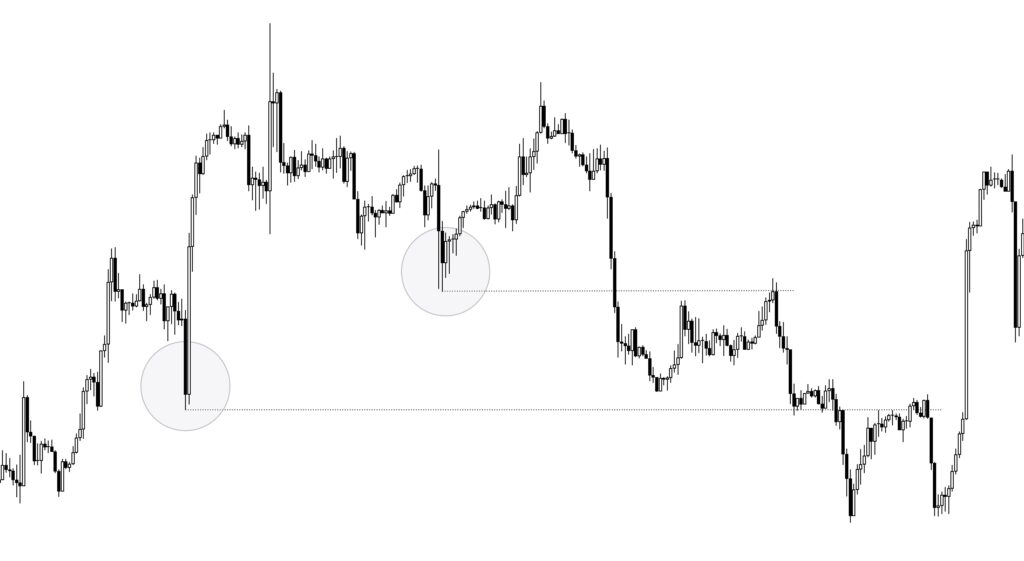
High Probability Order Blocks typically form at well-defined pivot points, resulting in the establishment of new highs and lows. In simpler terms, High Probability bullish Order Blocks are the ones responsible for creating a new high (if bullish) or a new low (if bearish).
Now, when these High Probability Order Blocks fail, they transform into what we call Breaker Blocks. These Breaker Blocks still function as Order Blocks, but their role reverses:
- Bearish Breaker:
- Initially, a High Probability Bullish Order Block acts as support, pushing prices higher.
- However, if it fails, it becomes a Bearish Breaker—now resisting price movement and pushing it downward.
- Bullish Breaker:
- Conversely, a High Probability Bearish Order Block initially acts as resistance, pushing prices down.
- If it fails, it transforms into a Bullish Breaker, now supporting price movement upward.
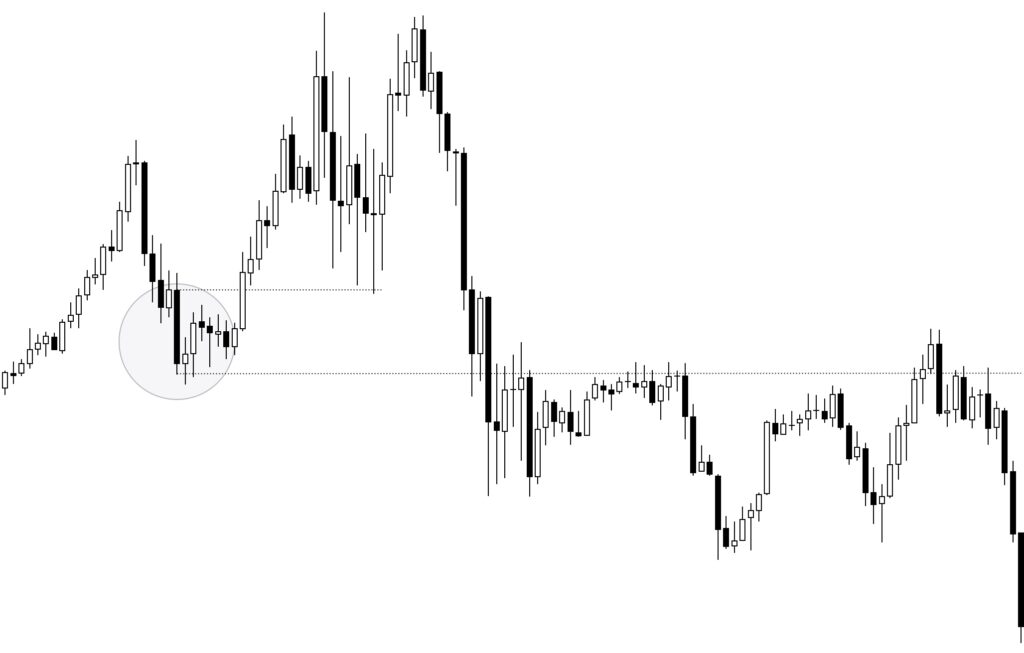
Mitigation Blocks
Mitigation Blocks, on the other hand, typically form from by one of two scenarios:
- High Probability Order Block Fails to Form:
- Imagine a situation where a High Probability Order Block begins to form.
- However, before it can achieve its purpose, it fails to break a previous high (in a bullish context) or a previous low (in a bearish context).
- This incomplete Order Block becomes a Mitigation Block.
- Order Block That Supports Trend Failures:
- Within a trend, various Order Blocks contribute to price movement.
- Sometimes, these trend-related Order Blocks don’t provide the expected support:
- They fail to push prices higher (in a bullish trend).
- Or they don’t prevent prices from going lower (in a bearish trend).
- These underperforming Order Blocks transform into Mitigation Blocks.
Now, here’s the key difference:
- Breaker Blocks (which also result from failed Order Blocks) tend to align with the overall trend. They are considered of higher probability.
- In contrast, Mitigation Blocks are contained within specific segments of the trend. There is a risk of the failure being of less significance and may reverse and continue within the larger trend.
Taking a Trade
Some traders choose to trade exclusively when Breaker Blocks form. Others may prefer a setup where the Breaker Block aligns with a Fair Value Gap (FVG)—a combination ICT refers to as The Unicorn due to its higher likelihood of success.
Traders can apply the same setup techniques described in ‘Understanding Order Blocks’, tailoring their approach based on risk tolerance and personal preference. Remember that Breakers and Mitigation Blocks are essentially variations of Order Blocks.
What Happens When Breakers and Mitigation Blocks Fail
When we talk about Order Blocks, we recognize that they serve as critical price levels in the market. These blocks can act as either support or resistance, influencing price movement. However, not all Order Blocks perform as expected. Some fail to fulfill their intended role.
- Breaker Blocks:
- When an Order Block fails to support the trend, it becomes a Breaker Block.
- These Breaker Blocks often align with the overall trend.
- They signal potential reversals or significant shifts in price direction.
- Mitigation Blocks:
- Another type of failed Order Block is the Mitigation Block.
- These blocks don’t fully support the trend but are contained within specific segments.
- They offer institutional buyers a chance to exit or mitigate their position
Now, back to your question: What happens when Breaker and Mitigation Blocks fail?
- Reclaimed Order Blocks:
- When Breaker Blocks or Mitigation Blocks fail, they revert to their original state as Order Blocks.
- We call them Reclaimed Order Blocks.
- Essentially, they return to their fundamental role as support or resistance levels.
Final Note
Traders encounter a significant challenge: identifying the right blocks to trade. Sometimes, these blocks overlap or clash, leading to confusion during analysis. In such moments, referencing higher timeframes can offer clarity, especially regarding the trend direction. Remember, as traders, it’s wisest to follow the trend and, when uncertain, err on the side of caution.